BibTag system maintenance: How to test COAX Cables & replace connectors
What's the most essential to your equipment? Your COAX cables! These are the veins of your system, playing a crucial role in your passings. The last thing you want are broken cables resulting in undetected passings at the day of your event!
Why you should test your COAX cables
Cable break can occur through wear of the equipment. Heavy objects on the cable or storing the cables in a wrong way may
also result in cable breakage. Luckily it’s easy to detect and solve. This process can be applied to both regular cable and angled cables. In this blog we'll discuss the process of executing the multimeter test, visual test and connector replacement. Following the steps in this order will take you through the entire process from inspecting the cables to replacement. Rather read it offline? Download the step-by-step guide here.
1. Multimeter test
Use a multimeter to check if there’s a break in the cable. There are 3 methods to execute this test. Hold the measure pins of the multimeter on the outside of the connector. When its showing zero hones, your cable is ok. A higher number indicates
cable break. Repeat this for the the inside, and both in and outside of the cable. The value on the multimeter should always be 0.0.
1. The outside shields (0.0hm)
2. Inner copper pins (0.0 hm)
3. The outside shield and inner pin together (infinite)
Don’t measure the cable when plugged into the decoder!
2. Visual inspection
Sometimes it takes just a visual check to define the condition of your cabling.
There a 3 indicators that implicate cable break:
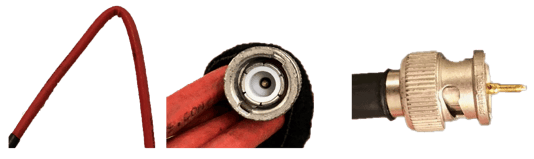
1. Cable bend. A cable that is bend in a unusual and sharper bend may indicate a cable break.
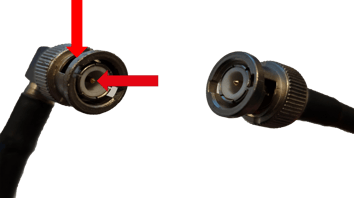
2. Sunken pin. A sunken pin indicates a broken connector. When the pin is too far in, the connection of your cable to the decoder will be unstable and weak.
3. External pin. A pin that stick out more than it’s supposed to, will also result in a poor connection between the cable and decoder.
 No flaws detected?
Great! your cabling is good to go! Remember to repeat these tests regularly to prevent inconveniences on your event.
3. Replacing the connector
If the Multimeter test and visual inspection determined a cable break, you can replace the connector to solve the issue. Decide if you still have enough cable left over when you’re cutting of the problem area, and follow these steps. Don’t have enough cable left over after cutting? Then replace your entire coax cable. MYLAPS offers a kit for replacing the cables/ connectors. (Art. 30S050)
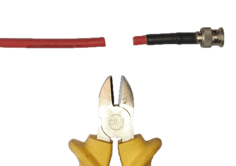
Tools used: Crimp tool, Side cutters, Knife, BNC crimp connector, Shrink sleeve (optional). Buy the BNC Connector replacement kit here.
1. Cut the old connector. Cut the cable at the problem area- but leave some space for the new connector.
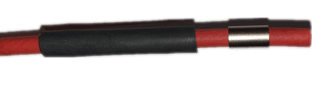
2. Apply shrink sleeve. Slide the shrink sleeve and Crimp ring (ferrule) over the cable. You’ll need this later.
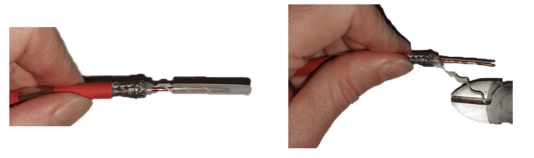
3. Cut the cable insulation to the braided shield.

4. Measure the braid to the plug and shorten the braid.

5. Cut the inner insulation.

6. Measure the length of the pin and shorten the conductor crimp on the pin. Crimp on the pin with use of the small slot of the crimp tool.
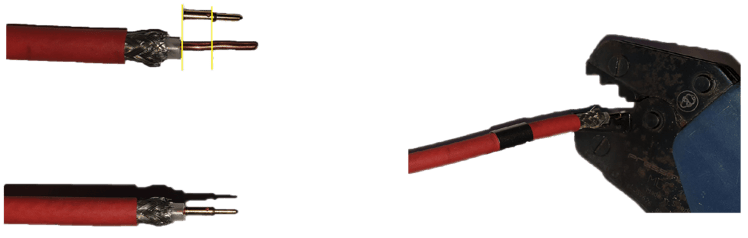
7. Insert the cable into the BNC plug. Push until it locks.
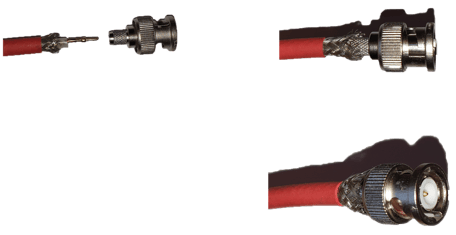
8. Slide the crimp ring over the braid against the plug and
crimp the ring. Crimp with use of the middle slot of the crimp tool.

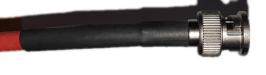
9. Heat the shrink sleeve. Slide the shrink sleeve over the crimp ring and heat so it shrinks nicely around the ring.
Done!
That’s it, now you can use your COAX cable for your decoder again.

Want to check it again?
Download this step by step guide as a handbook, so you can check your cabling whenever you want it, offline.
Want to learn more?
Looking for more maintenance guides or other information on your hardware/software?
Visit help.mylaps.com for more guides, videos, and manuals and visit our website for more info about timing a running race or other mass-active sports.